Mastering the Philips X7-2t TEE Probe: Common Faults, Diagnostics, and Repair Solutions
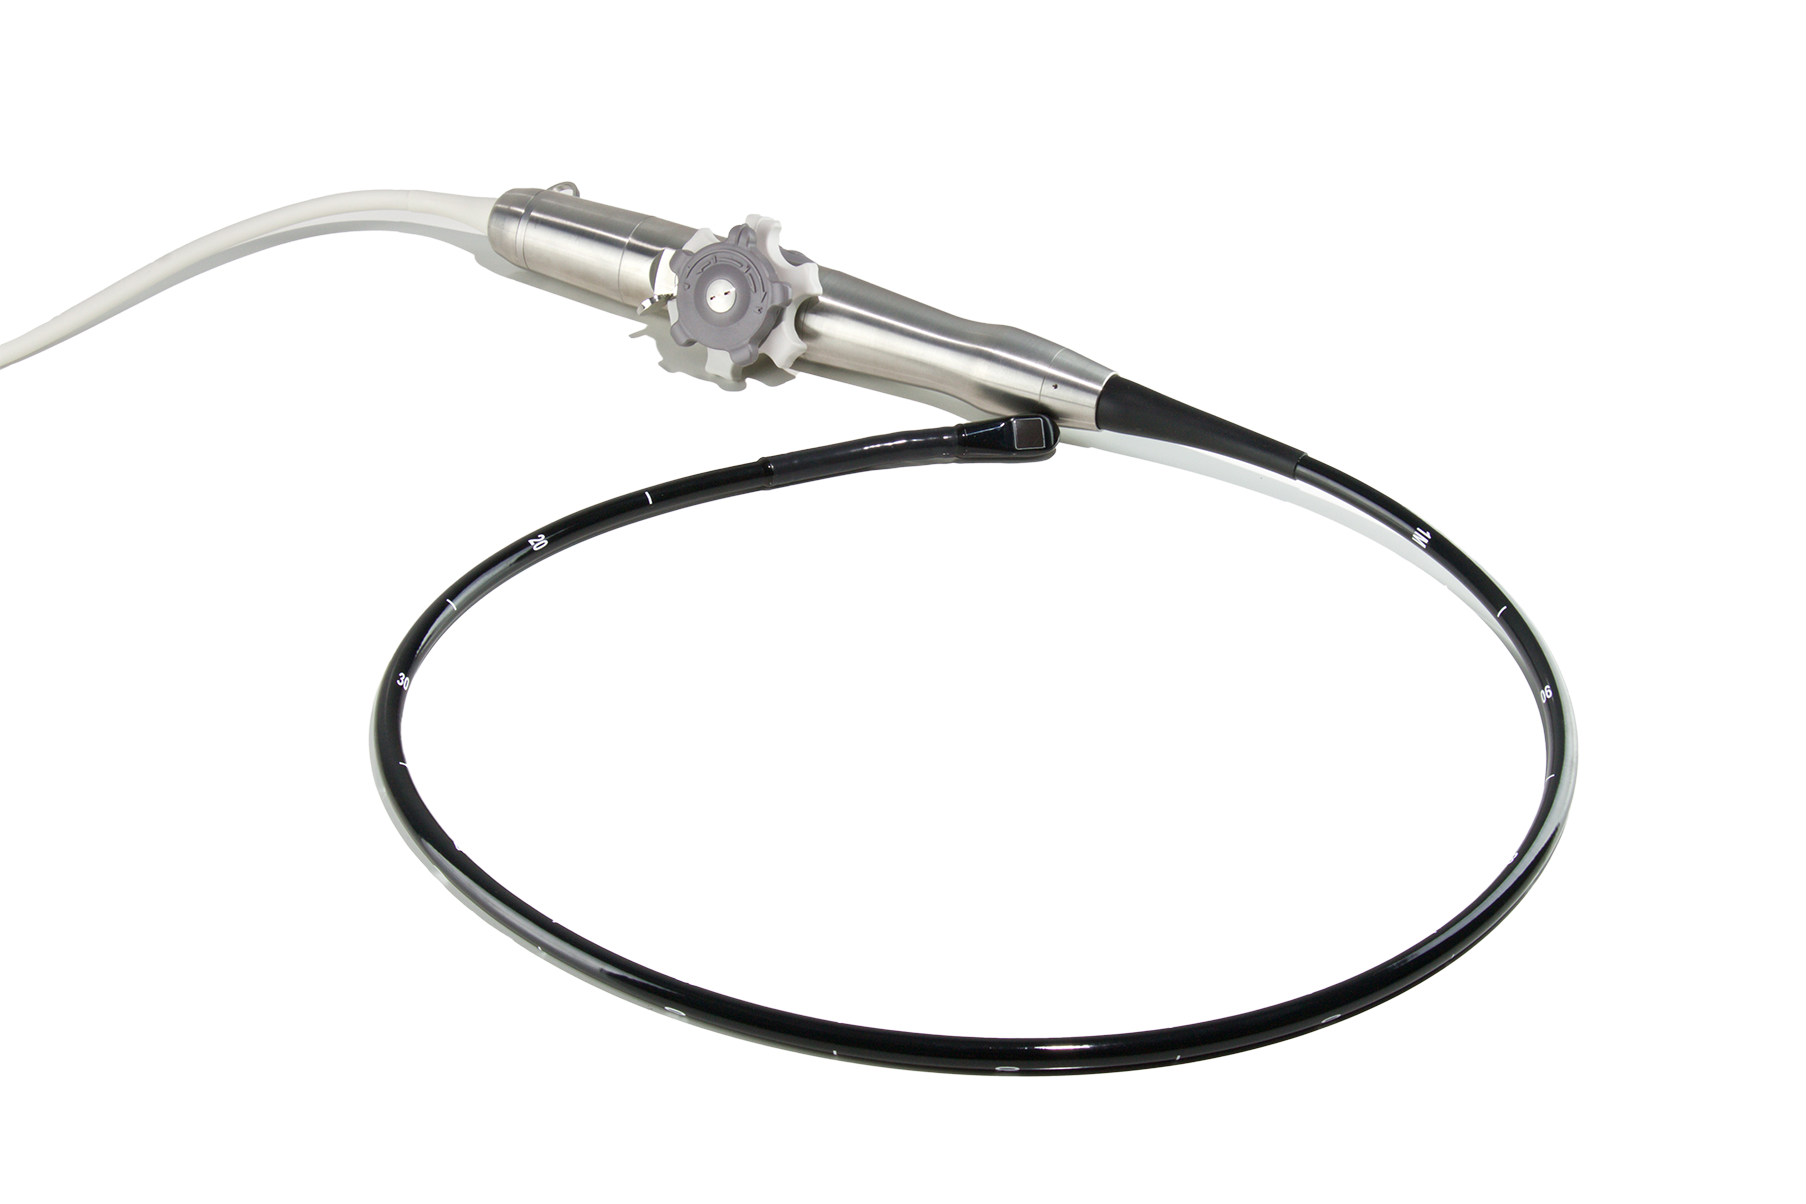
The Philips X7-2t is widely recognized as a gold standard in Transesophageal Echocardiography (TEE). Utilizing advanced xMatrix technology, this probe delivers real-time 3D and 4D imaging that is critical for complex cardiac procedures. However, the sophistication of this technology also makes the probe highly sensitive and susceptible to damage.
Because TEE probes are semi-invasive devices, they are subjected to rigorous sterilization processes and physical manipulation during patient exams. This constant wear and tear can lead to a variety of mechanical and electronic failures. Understanding these common faults is essential for biomedical engineers and sonographers to ensure patient safety and extend the lifespan of this expensive equipment.
In this guide, we will explore the most frequent issues encountered with the Philips X7-2t. We will also outline the diagnostic criteria and standard repair solutions available to restore functionality.
1. Physical Trauma to the Insertion Tube and Bending Rubber
The most visible and frequent damage to the X7-2t occurs in the flexible insertion tube and the distal bending section. This area is in direct contact with the patient's anatomy and is often subjected to biting reflexes or accidental clamping.
Bite Marks and Holes
Patients undergoing TEE procedures are usually sedated, but bite reflexes can still occur. If a bite block is not properly secured, the patient's teeth can puncture the soft coating of the insertion tube. Even microscopic holes can compromise the electrical insulation of the device.
Repair Solution: For superficial damage, the outer coating can sometimes be patched or resealed using medical-grade urethane. However, if the damage penetrates deep into the shielding or internal wiring, the entire insertion tube may need to be replaced to pass electrical leakage safety tests.
Bending Rubber Degradation
The distal tip of the probe, known as the bending section, is covered by a specialized rubber material. Over time, exposure to high-level disinfectants (like Cidex or peroxide-based cleaners) causes this rubber to become brittle, porous, or loose. A compromised bending rubber allows fluid to enter the articulation mechanism.
Repair Solution: Replacing the bending rubber is a standard maintenance procedure. Technicians remove the old rubber, clean the underlying mechanical links, and bond a new specific X7-2t bending rubber to the distal tip. This restores the hermetic seal and ensures smooth articulation.
2. Fluid Invasion: The Silent Killer
Fluid invasion is perhaps the most catastrophic failure mode for TEE probes. Because these devices are submerged in fluids during cleaning and use, any breach in the physical housing leads to internal corrosion.
Fluid typically enters through three main points:
- The acoustic lens (scan head).
- The bending rubber seams.
- The control housing (handle) if not properly sealed.
Once fluid reaches the internal electronics, it begins to corrode the micro-coaxial cables and the acoustic array itself. In the X7-2t, which relies on complex matrix circuitry, this corrosion can cause short circuits that are difficult to isolate.
Repair Solution: If fluid invasion is detected early via a leakage tester, the probe can be dried out and resealed. However, if corrosion has set in, the repair is extensive. It often requires re-terminating the cable harness or replacing the entire array assembly, which is a high-level repair requiring specialized micro-soldering skills.
3. Articulation and Steering Mechanism Failures
The X7-2t features a four-way articulation system that allows the physician to navigate the probe tip within the esophagus. This system relies on control knobs on the handle that pull on high-tensile steel wires running down the length of the probe.
Broken Steering Cables
Excessive force applied to the control knobs can snap the internal steering cables. When a cable breaks, the probe will lose the ability to angulate in one or more directions (Anterior, Posterior, Left, or Right). The knob may spin freely without resistance.
Repair Solution: Repairing articulation requires opening the handle and the insertion tube. The broken wires are removed and replaced with new stainless steel articulation cables. The tension is then calibrated to ensure the tip bends to the manufacturer's specified angles (usually 120 degrees anterior/posterior).
Brake/Lock Failure
The braking mechanism holds the probe tip in a fixed position during imaging. Wear on the friction plates or locking cams inside the handle can cause the brake to slip, making it impossible to maintain a stable view of the heart.
Repair Solution: The handle must be disassembled, and the friction components of the braking system are either cleaned or replaced. This restores the tactile feedback and locking capability of the control knobs.
4. Image Quality Artifacts and Electronic Faults
Even if the probe looks physically perfect, the image on the ultrasound system may tell a different story. The X7-2t transmits massive amounts of data, and signal integrity is paramount.
Dead Elements and Dropout
Black vertical lines or shadows in the ultrasound image usually indicate dead piezoelectric elements or broken signal wires. In a matrix probe like the X7-2t, this can also manifest as a general degradation of 3D resolution rather than a simple black line.
Repair Solution: Diagnosing this requires an acoustic phantom test and capacitance testing of the individual pins. If the issue is a broken wire in the cable, a "strain relief repair" or cable re-termination can solve it. If the crystal elements in the tip are shattered (often due to dropping the probe), the scan head must be replaced.
Overheating Errors
The X7-2t contains thermal sensors to prevent burning the patient's esophagus. If the probe detects a temperature exceeding roughly 43°C (109.4°F), the system will shut down the transducer. Faulty thermistors or delamination of the internal layers can cause false overheating alarms.
Repair Solution: Technicians must verify if the probe is actually overheating or if the sensor is faulty. If the array is generating excess heat due to internal shorts, the array assembly requires replacement. If it is a sensor error, the thermistor wiring can be repaired.
Conclusion
The Philips X7-2t is a robust but delicate instrument. While minor issues like bending rubber wear are inevitable consumables, major failures can often be prevented through careful handling and rigorous leakage testing.
Regular maintenance checks and immediate attention to physical damage are the keys to longevity. When failures do occur, partnering with a repair facility that understands the specific architecture of the xMatrix technology is crucial. Proper refurbishment not only saves significant capital compared to buying new but also ensures that patient diagnostics remain accurate and safe.

